Start / 01
Getting started
Installation, first launch, basic navigation, editing, and saving.
Before you begin
- GlassTracker requires iOS 16 or later and supports iPhone and iPad.
- Use headphones or start with your device volume low. Factory projects and hosted synths can be loud.
- AUv3 instruments and effects are separate apps. Install and open an Audio Unit app once if iOS asks it to finish setup.
- Projects are stored locally in GlassTracker’s Documents folder. TestFlight updates normally preserve it; deleting the app deletes its container.
- Help in the app header opens this manual, Remote pairs or connects an iPhone/iPad controller, and Files opens the iOS Files app at GlassTracker’s folder.
All features are enabled in this tester build. Device → What’s New lists the changes included in each build. Device → Discord opens the community server, and Device → PicoTracker HW opens the hardware picoTracker site; both leave GlassTracker and open in their own app or browser.
In Files, open On My iPhone → GlassTracker and copy important project folders somewhere outside the app before deleting it.
First launch
GlassTracker seeds its factory projects and sample library the first time it runs, then opens the most recently used project. A fresh install starts with a new untitled project; use Project → Browse to open dark-fog or another factory project.
If an interrupted earlier launch left the disposable untitled project incomplete, GlassTracker rebuilds it automatically. Saved named projects are not replaced by that repair.
If the project uses Audio Units, a Loading project audio… panel may briefly appear. GlassTracker restores plug-in state during project load so the first press of Play does not have to initialize the graph.
On iPadOS 26 with a physical keyboard connected, restored Audio Units may hand keyboard focus away from GlassTracker. If External keyboard ready — Tap once to activate appears, tap it once; the touch is consumed and tracker keyboard control resumes in any iPad layout.
Before connecting external MIDI or an AU instrument, read the route as three separate choices: the MIDI instrument's DEST, the AU slot's LISTENS ON channel, and—when needed—the channel it DELIVERS AS to the plug-in. Device → MIDI Ports and MIDI Input control incoming hardware routes. The MIDI chapter walks through each path.
Basic project walkthrough
Tap PLAY. Tap it again to stop. The orange play marker and channel meters show what is sounding.
Use the D-pad on the Song grid. A two-digit value is a chain; -- is empty.
Hold NAV and tap RIGHT to open the selected Chain. Do it again on a phrase value to open the Phrase.
Move to the note column. Hold ENTER and tap an arrow: left/right changes by a small step; up/down changes more quickly.
Hold NAV and tap LEFT to move back through Phrase → Chain → Song.
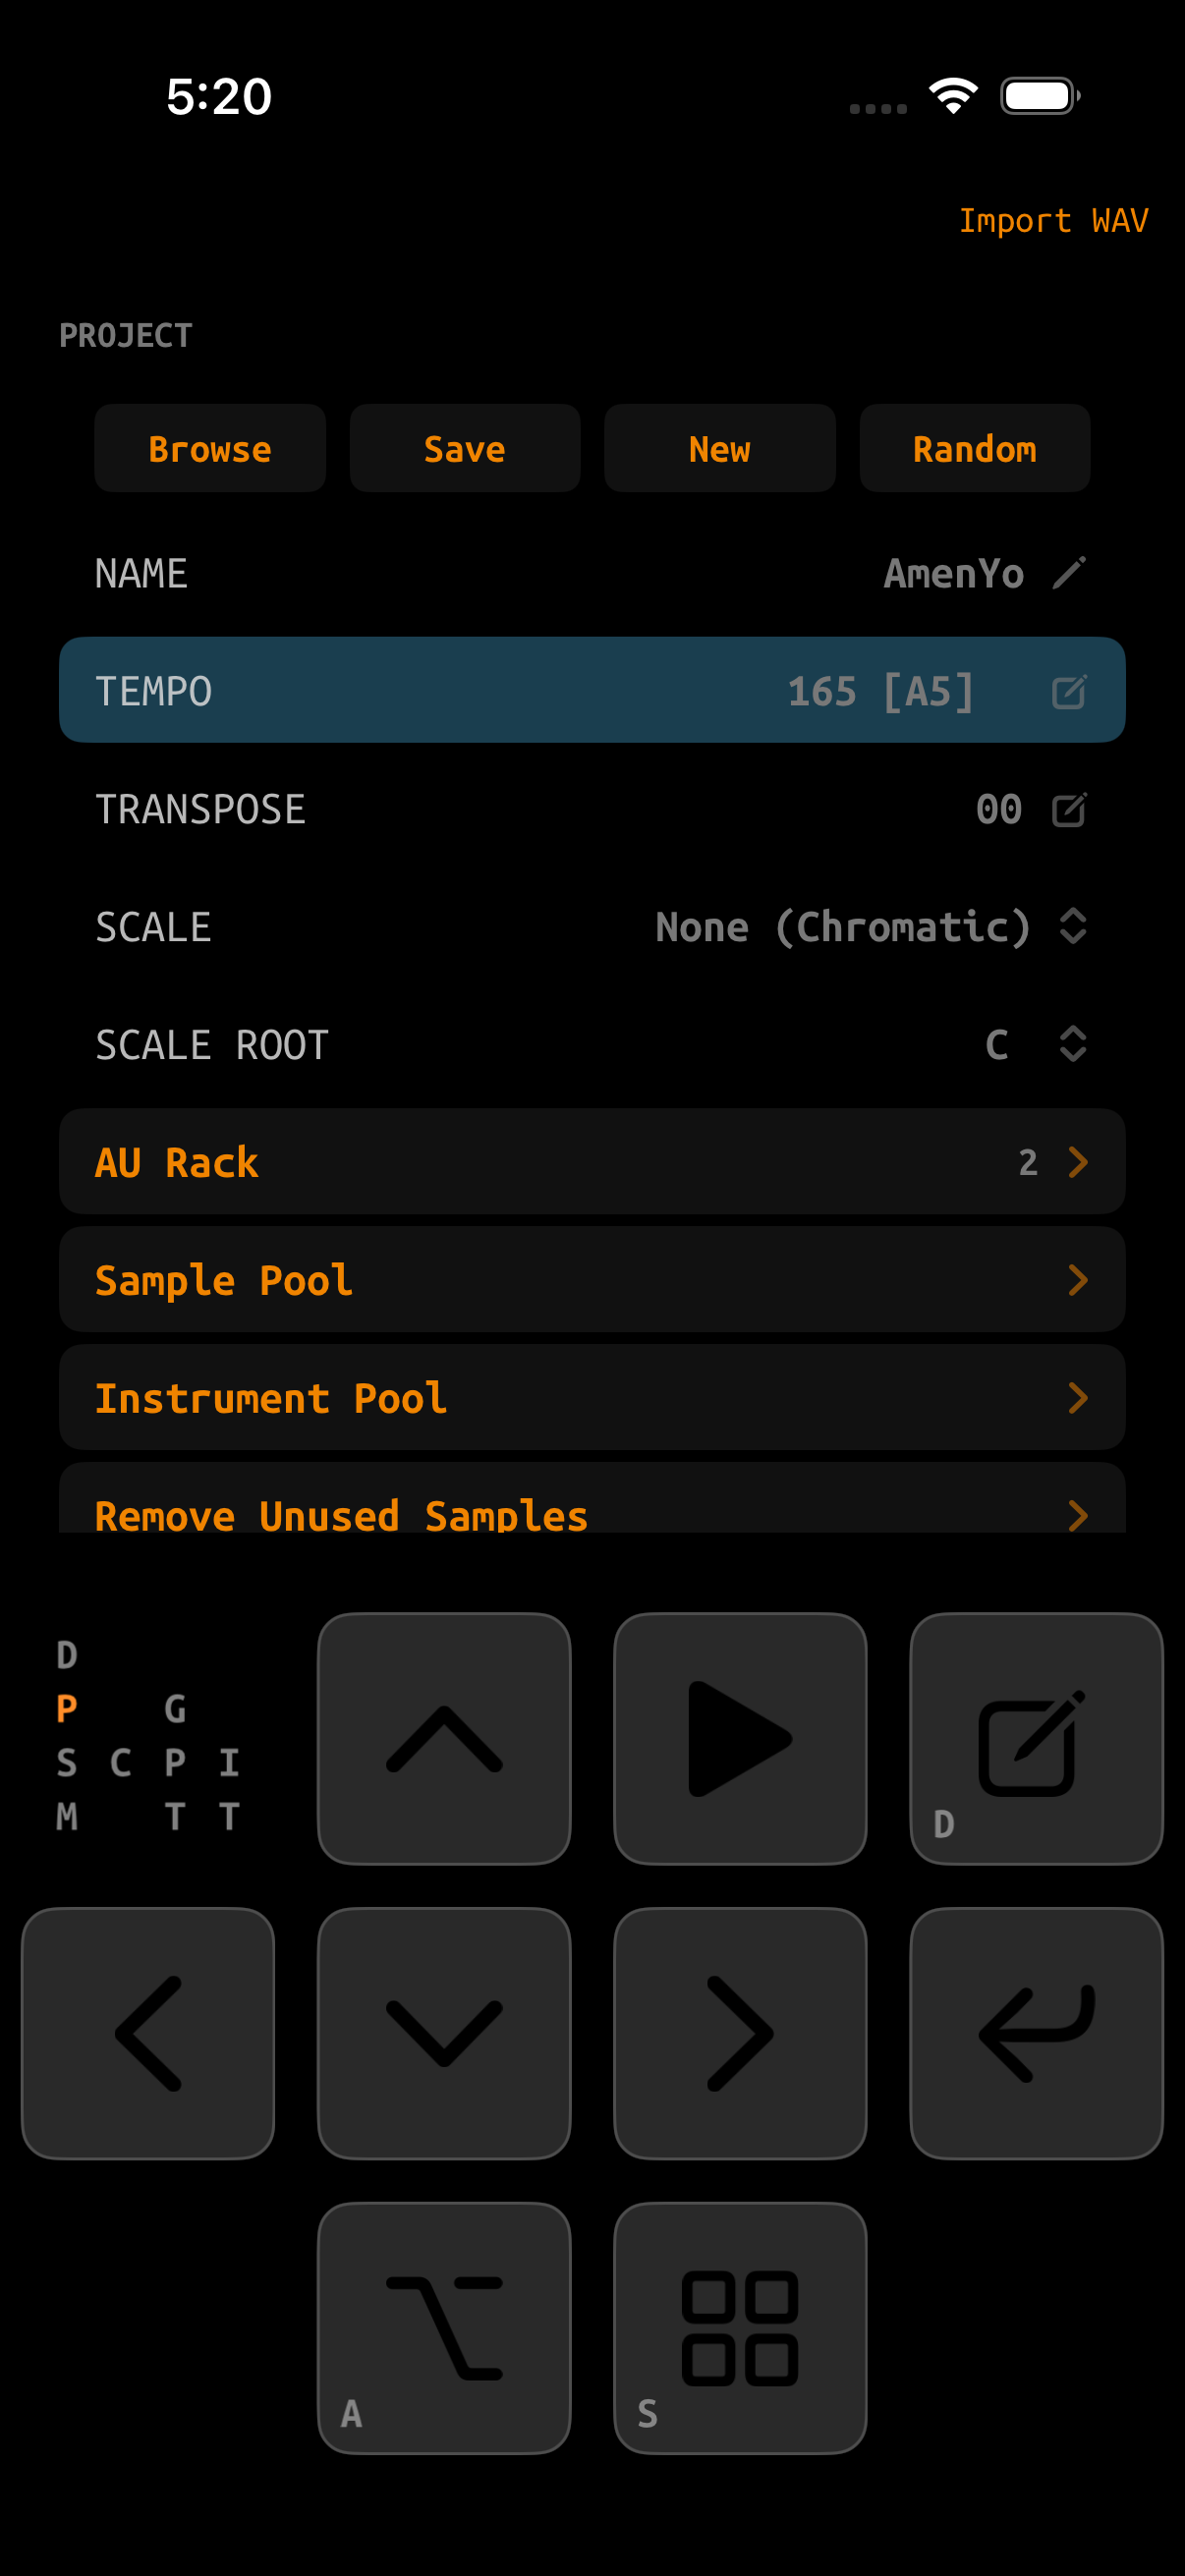
From Song, use NAV+UP for Project. Rename the project, then use Save. For a factory project, create a new named copy before experimenting heavily.
Control pad summary
Move focus or the tracker cursor. Plain arrows generally do not edit values.
Insert or activate. Hold with arrows to change the focused value.
Copy/select in grids; hold with arrows to step lists and alternate settings.
Hold with an arrow. Left is back; right drills deeper.
Selections, cloning, cut/paste, jumps, and tempo adjustment.
Starts playback. On sample screens it auditions the current sound or region.
The core screen map
The small map in the tracker display shows your current location. Hold NAV while pressing arrows to follow it:
| From Song | Destination | Purpose |
|---|---|---|
| NAV + UP | Project | Save, tempo, scale, pools, rack, record, render. |
| NAV + DOWN | Mixer | Levels, mute/solo, channel strips, AU returns. |
| NAV + RIGHT | Chain | Open the chain under the cursor. |
| Chain → NAV + RIGHT | Phrase | Open the phrase under the cursor. |
| NAV + LEFT | Back | Return one level from almost any screen or native page. |
Touch and hardware keyboard
The on-screen pad accepts multiple fingers, so press-and-hold chords work exactly like hardware buttons. Keep the modifier held while tapping the second button. For one-finger chords between neighboring function keys, Device → ENABLE MULTITOUCH can add linked two-key zones; see Controls & navigation. The app also supports a connected hardware keyboard:
| Keyboard | GlassTracker control |
|---|---|
| Arrow keys | D-pad |
| Return or F | ENTER |
| A | ALT |
| S | NAV |
| D | EDIT |
| Space | PLAY |
| M | Toggle Musical Typing |
Musical Typing turns the standard A W S E D F T G Y H U J K row into a chromatic octave; Z/X change octave. Open its keyboard/routing control to choose a tracker instrument or AU destination.
Save safely
Use Project → Save for explicit saves. GlassTracker also autosaves and saves when iOS backgrounds the app while transport is stopped. If audio is still playing, the save waits until playback stops so the audio graph is not torn down mid-render.
Project data is committed transactionally: the previous good generation is retained while the new one is written. Even so, make Files backups of work you cannot replace—especially during an alpha.